Before you begin, as the API setup is constantly being changed from Instagram, you may wish to use a 3rd party plugin such as https://en-gb.wordpress.org/plugins/instagram-feed/
This plugin not only offers a much simpler setup, it is also very flexible and can create square galleries no matter the original image size supplied to Instagram and much more.
Due to recent changes in the Instagram API – the process for setting up an instagram feed has become a little trickier, but this guide will help with every step of the way. Essentially you need to create a Client (so Instagram know who you are), and then an access token (the thing that gives your site permission to show images)
IMPORTANT NOTE – You will need to follow these steps using the account you wish to display in your feed, you are not able to show another users feed so using one account (your own for instance) to display anothert users images (your client, for example) will not work.
Step 1 – Creating A Client
To begin, you will need to visit https://www.instagram.com/developer/, where you will be greeted by the following screen.

Hit the ‘Register Your Application’ button to continue to the next step. On the next screen (seen below) hit ‘Register a New Client’

Next, you need to fill in the form provided – most of it is self-explanatory, the key thing to remember is to enter the following in the Valid Redirect URL field
http://www.tommusrhodus.com/instagram/

Ok, step 1 is done, you now have a client, and more crucially, you now have the Client ID you need for the next part. Copy this Client ID into a notepad, you will need it again soon.

Step 2 – Edit Client
Now you have a client, your going to need to allow it to authorise use of your images. To do this, hit the Edit link to begin editing your clients settings.
Once in the settings, head to the Security tab and Uncheck the Disable Implicit OAuth option and hit save.

Step 3 – Putting It All Together
Remember that Client ID from before? Your going to need it here.
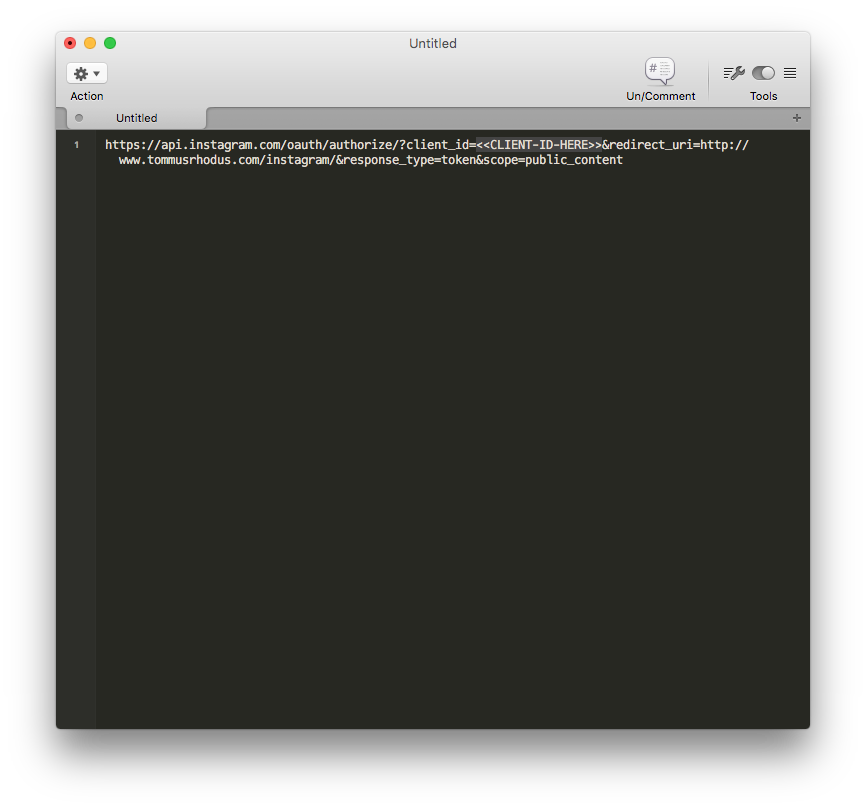
To create the Token needed (to enter into the theme options) you will need to copy this url into whatever text/code editor you wish
https://api.instagram.com/oauth/authorize/?client_id=CLIENT-ID-HERE&redirect_uri=http://www.tommusrhodus.com/instagram/&response_type=token&scope=basic
Replace the CLIENT-ID-HERE text with your actual client ID and then copy the whole URL (complete with your own ID) into your browser.
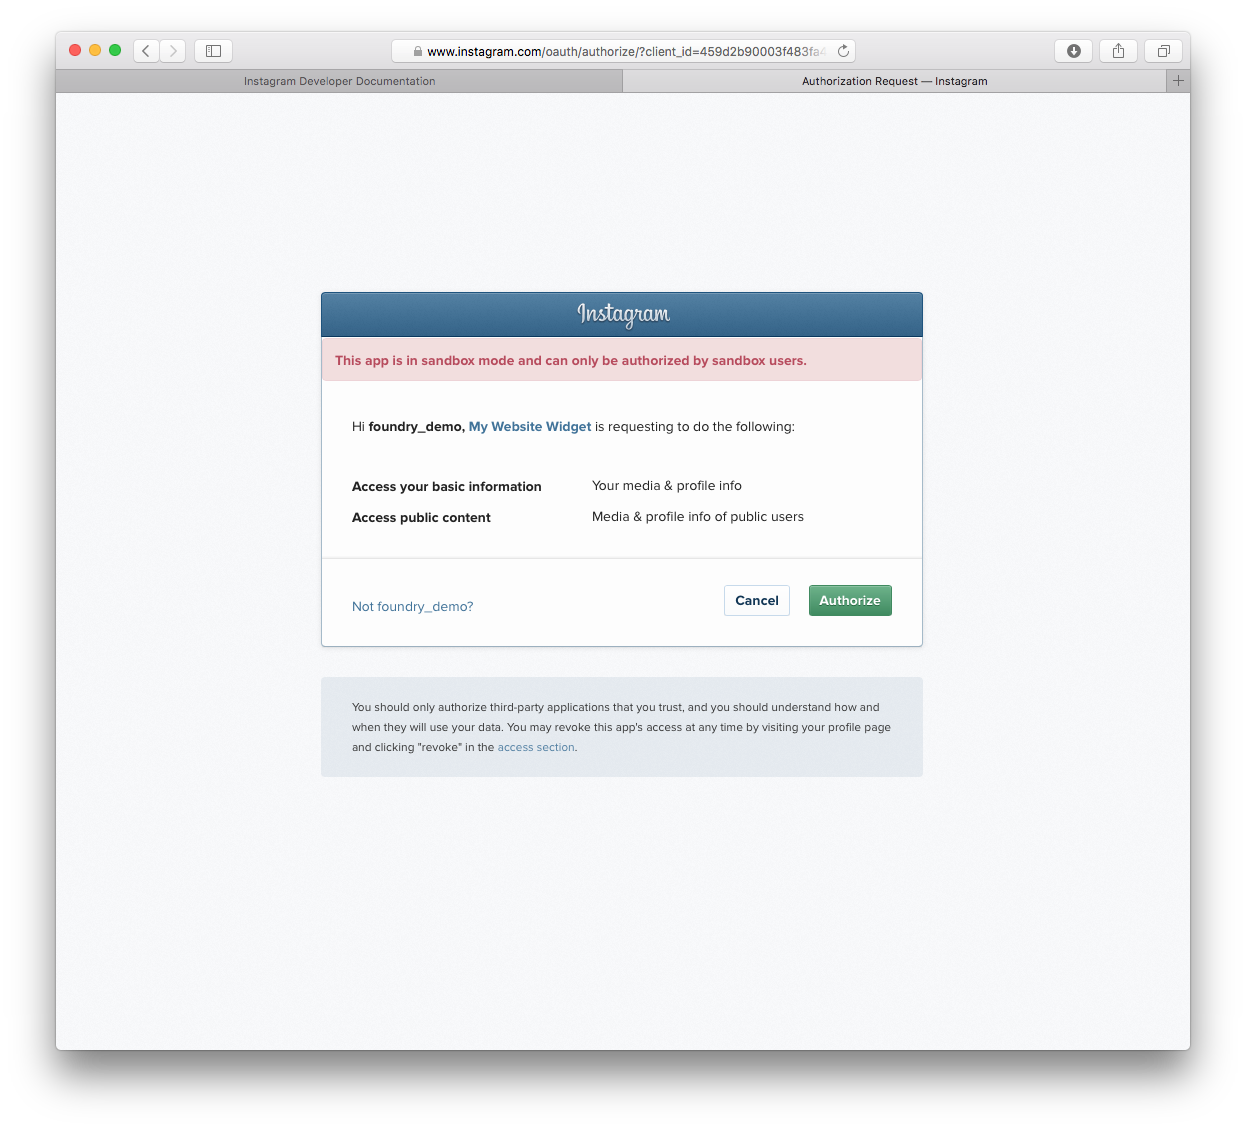
Next, you will be asked to Authorise access, just hit the Authorise button and continue to the final step.
Once done, you will be presented with this screen.
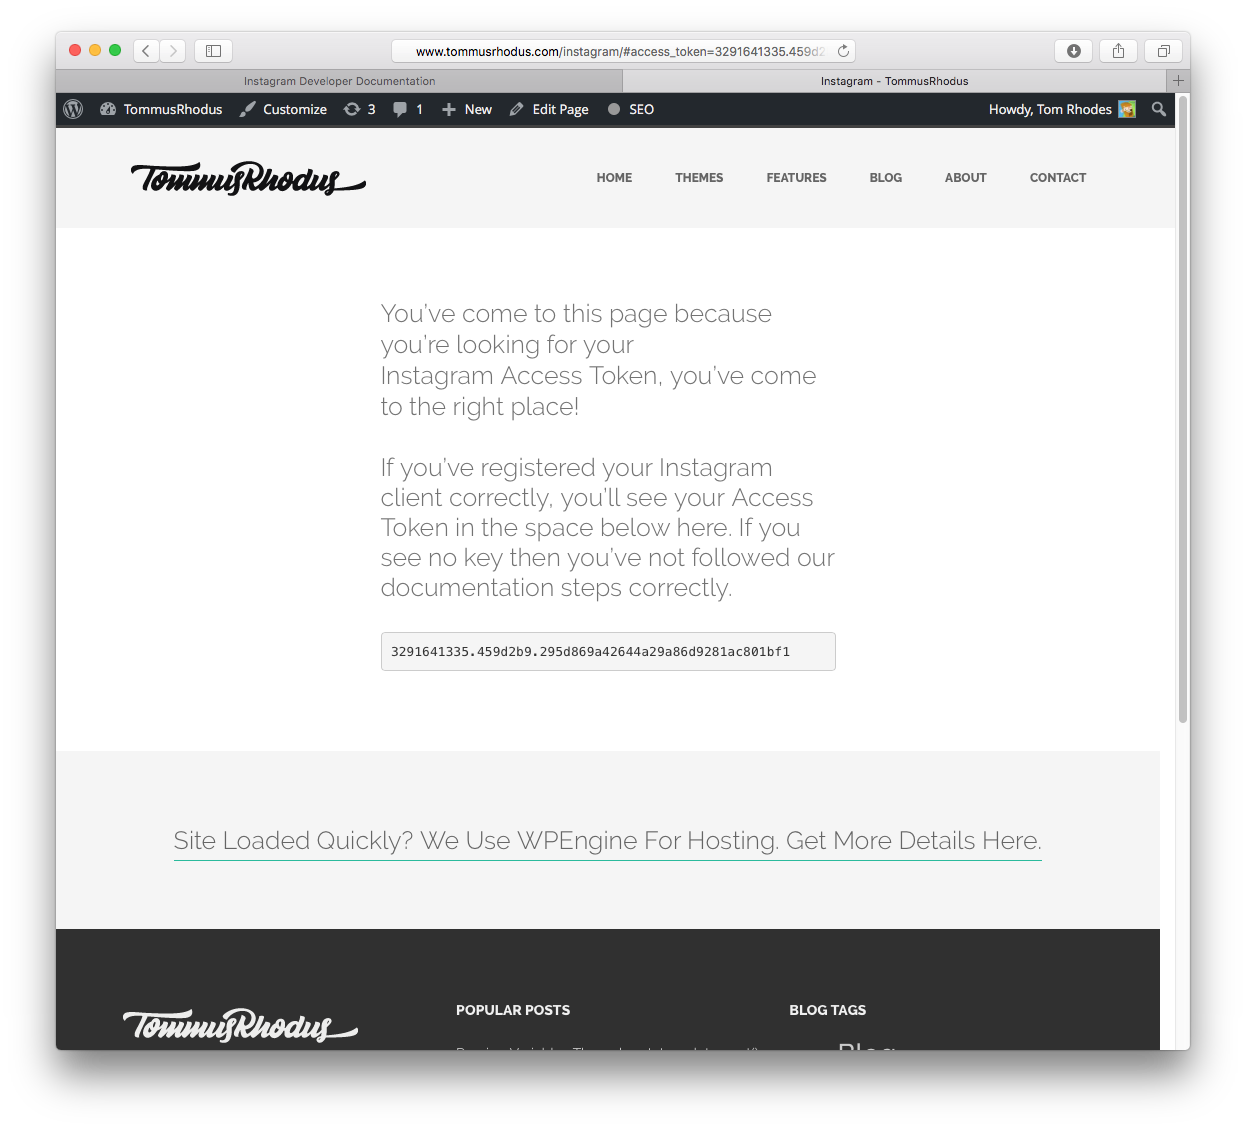
Copy the Token provided into the theme settings and your done

TROUBLESHOOTING
1. Receiving a 400 error? You must ensure the redirect URL you are entering is EXACTLY as follows (trailing slash included)
http://www.tommusrhodus.com/instagram/
2. Please note that sadly, the way in which Instagram have changed their API means that HashTag based feeds are currently unavailable. We’re happy to have created a system to get user feeds back up and running and will re-add HashTag feeds in the future if we can. Your understanding that we’re doing everything within our power is appreciated.
3 – When creating your client for the above steps, you MUST make the clients using the account which contains the images you wish to display. You cannot create a client based on one account, and then expect the feed to be able to show another users images – since the Instagram update this simply cannot work.
4 – Need a Numerical ID? Head here to locate your Instagram “Numerical ID” based on your username. https://codeofaninja.com/tools/find-instagram-user-id – This is only required in some of our older themes such as Kubb
5 – Seeing a “Recaptcha” issue when attempting to sign up for a new developer client? If your seeing a message such as the one below
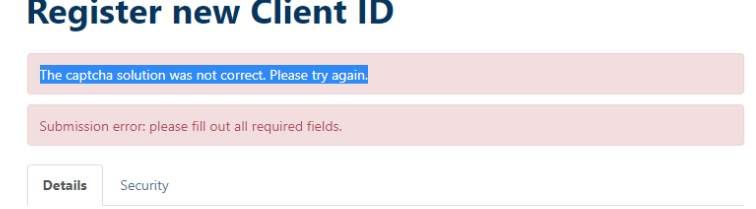
When trying to sign up for a new instagram client, you may wish to use chrome and install this extension https://github.com/PhilGrayson/chrome-csp-disable which should allow the form to work.
This issue has been reported to the instagram team and we hope its resolved soon